This post is sponsored by Alexia Foods though all opinions are my own.
We are still working on smoothing out the kinks in our ‘back to school’ routine. It seems that no matter how much you prepare, it still takes time to get into the groove again. Luckily, the kids were eager to return to the classroom and greeted the first day with excitement. We had an extra challenge this year. My girls returned from a family wedding in Greece one day before school started so their little bodies were functioning 8 hours ahead of everyone else’s. Yes, we added a healthy dose of jetlag to new classmates, new teachers, and packing lunches.
I’m trying to cut myself some slack with our food routine. When I have the time, I love being creative and feel compelled to treat the kids to yummy, new lunchbox surprises. With too much on our plates this year, I’m working to convince myself to take the easy route for a while and stick to old favorites.
Now and then, an opportunity in my Whipped inbox jumps out at me as its theme feels in sync with my current state-of-mind. While reading an introduction to Alexia, I was first piqued by their bag of all-natural Sweet Potato Fries made with only real ingredients and touting the GMO-free label. Oven-baked sweet potato fries are a family favorite but the fresh potatoes take a long time to peel, slice and bake. Since I’ve been selling myself on convenience lately, I decided that Alexia’s frozen, all-natural Sweet Potato Fries were worth a try.
Once I get involved with anything, I usually get involved 120%. (Moderation is something I am working on.) Standing in front of the freezer case while surveying my options, my wheels began turning with snack and meal ideas for the kids. Before I knew it, I had filled my cart with five different types of Alexia potatoes! Waffle, crinkle, tots, rosemary, sea salt…
A nearby shopper was furtively eyeing me as I read the packages and pulled one bag after another off the shelf. By the time the door swung shut, it was completely fogged with moisture from my extended rendezvous with the frozen spuds. She must have been piqued by my Alexia potato hoarding because as I wheeled away, she abandon her original choice and took some Alexia fries for herself. (New marketing idea: hire people to hoard your product during peak grocery shopping times luring other shoppers to see what all the fuss is about!)
We first sampled the Seasoned Waffle Cut Fries alongside grilled flank steak and salad. When taste testing, most people go in ready to be critical. But, from first bite through second helpings, my family’s comments escalated from “hmmm, pretty good” to “I wouldn’t complain if these were served in a restaurant” to “Wow, I am really pleasantly surprised!”
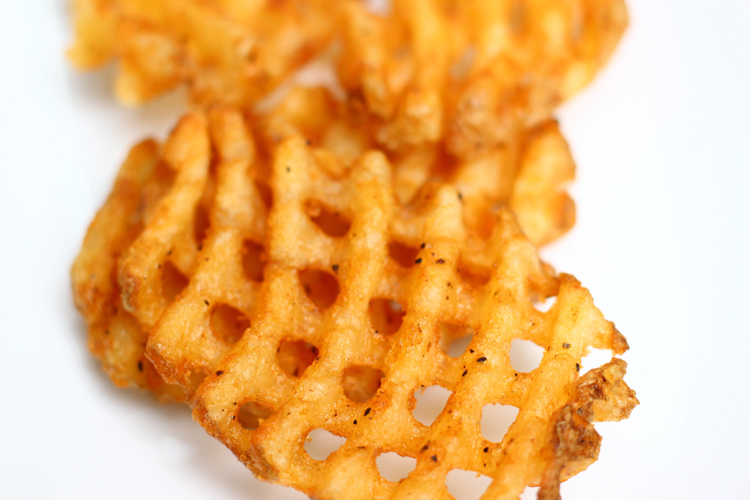
I baked the Seasoned Waffle Cut Fries a few minutes longer than suggested because I like them quite crispy. The grooves were filled with a light seasoning of salt, pepper, onion and garlic. The skins are still on the edges of the fries and the potatoes feel “real,” not like the oddly compressed frozen potato products. I literally just salivated remembering these fries as I loaded this photo into the post:
![Waffle-Fries-Potato]()
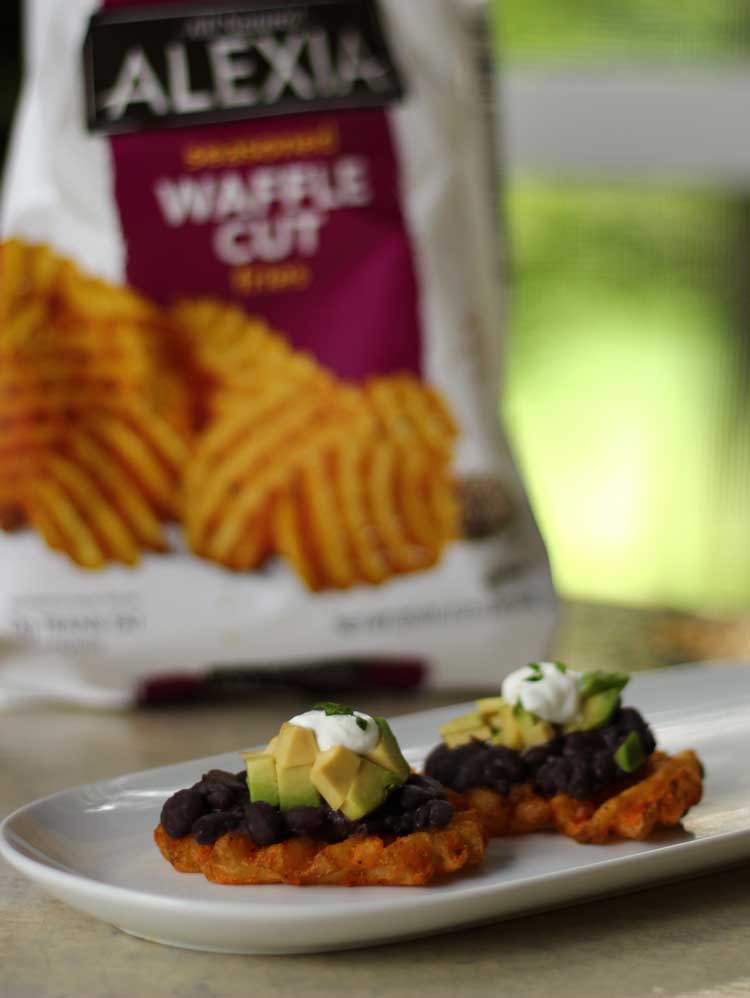
We have a toaster oven that I use daily to reheat and bake things. I often freeze meatballs and cookie dough and just bake what we need as we go. As an after school snack, I prepared a few of the Seasoned Waffle Cut Fries and loaded them with seasoned black beans, avocado and a tiny dollop of low fat sour cream. (see recipe below) You could add cheese or other nacho-like toppings, but I was trying to keep them healthier with a heavy dose of the protein-packed beans and fresh avocado. The kids loved them and said they would be happy to eat them for their entire dinner some time while my husband and I agreed that with a little garnish, they are yummy enough to serve as appetizers at a party.
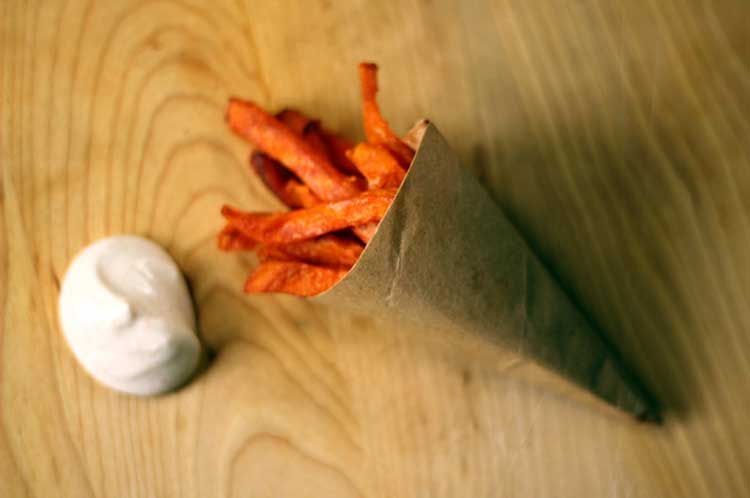
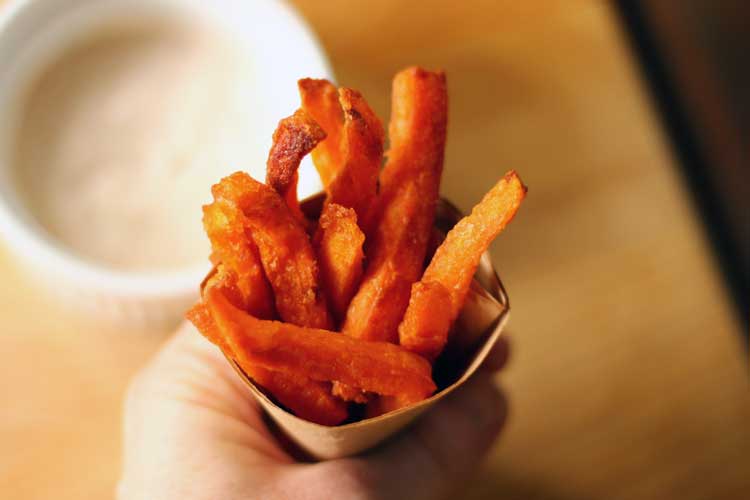
In the Netherlands, where my husband grew up, French fries are sold in paper cones on the street with a dollop of sauce for dipping. Inspired by the dip recipes on the Alexia Foods website, I had the idea to serve the kids Sweet Potato Fries in little paper cones as an after school snack. With wee ones, I’ve found that fun presentation can make a good snack great. The all-natural Sweet Potato Fries, which are touched with just a hint of sea salt, were perfect alongside this Honey Chipotle Dip I concocted. (see recipe below)
![Sweet-potato-fries-paper-cone]()
I made these paper cones by cutting open a brown paper lunch bag and folding it in half for double weight before wrapping into a cone. See how to wrap paper into cones here. Or, keep some earth-friendly bamboo cones on hand for snacks and hors d’oeuvres.
![Sweet-potato-fries-chipotle-dip]()
While standing at the freezer case perusing the frozen potatoes, I was surprised to find Sweet Potato Puffs, which pushed my nostalgia button. When I was growing up, one of the perks of “babysitter nights” was a plate full of chicken nuggets and tater tots. There is just something about those little bite-sized nuggets – soft on the inside, crunchy on the outside. My kids love sausage of all kinds from bratwurst to bison to turkey sausage. So, I skewered the Sweet Potato Puffs alternating with slices of sausage and served it with some of the leftover Honey Chipotle Dip. Eureka – another hit!
![tater-tot-sausage-kabobs]()
Instead of finding a little ease with frozen potatoes, I turned my introduction of Alexia into a creative endeavor spending hours exploring new recipe ideas. But, these winners can now be added to our repertoire of easy weeknight meals and after school snacks!
If you want to taste Alexia’s products, they are bringing their Farm to Flavor experience on the road this fall. Their food truck is touring the east side of the country stopping for cooking demonstrations and offering samples.
St. Louis Taste Festival, St. Louis, MO: September 19-20
Taste of Atlanta, Atlanta, GA: September 26th 12-7 p.m. and September 27th 12-6 p.m.
Great Grapes Wine, Arts and Food Festival, Charlotte, NC: October 3rd
Annual Apple Harvest Festival, Southington, CT: October 9-11
Head of Charles, Boston, MA: October 17-18
If you aren’t able to catch the food truck, you can find Alexia’s premium, gourmet frozen potatoes, appetizers, breads and sides at natural, club, grocery & mass retail stores nationwide. Visit their site here for more info.
![Alexi-waffle-fries-with-package]()
Black Bean Avocado Waffle Fry Bites
Makes 12
12 Alexia Seasoned Waffle Cut Fries
1 can black beans
1 tsp ground cumin
½ tsp salt
½ tsp dried oregano
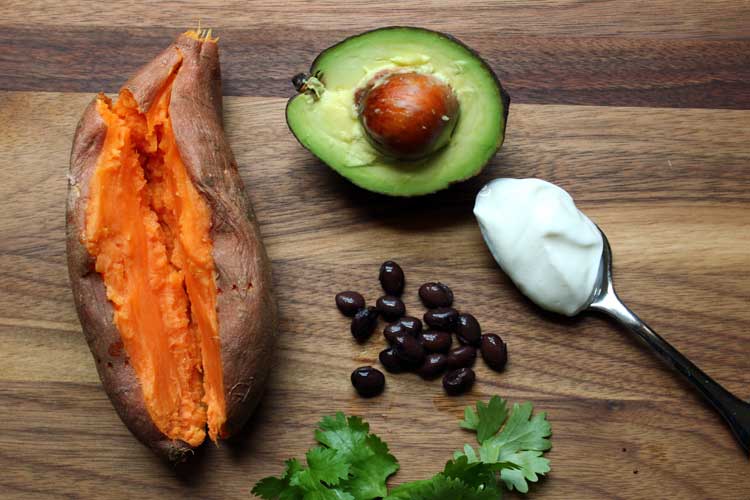
1 medium avocado
Light sour cream
Chives, chopped (for garnish)
Preheat oven and cook 12 Alexia Seasoned Waffle Cut Fries according to package directions. While they are baking, open the can of black beans and drain ¾ of the liquid from the can. Pour the beans into a small saucepan over medium heat. Add the cumin, salt and oregano. Using a potato masher or back of a spoon or fork, mash the beans a few times leaving a majority of the beans whole. Stir frequently over medium heat for about 10 minutes until they are warmed through and slightly cooked down. They should be thick so they don’t run through the holes of the waffle cut fries. Remove the beans from heat.
Cut the fresh avocado into ½ inch chunks. When the fries are ready, top with a spoon full of black beans, some avocado pieces and a small dollop of light sour cream. If desired, garnish with freshly chopped chives.
Honey Chipotle Dip
Makes ½ cup
½ cup light sour cream
¼ teaspoon dried chipotle chili powder
¼ teaspoon salt
2 teaspoons honey
Combine all ingredients in a bowl. Serve with fries, sweet potato puffs or sweet potato puff sausage kabobs.
Sweet Potato Puff Sausage Kabobs
Makes 4 kabobs
Approximately 16 Alexia Sweet Potato Puffs
2 smoked kielbasa or turkey sausage links
Wooden skewers
Slice cooked sausage in ½ inch slices. Line the slices on a baking sheet with the Sweet Potato Puffs. Bake in the oven according to Sweet Potato Puff package directions, turning the puffs and flipping the sausage disks half way through. Remove from oven and place on skewers alternating between Sweet Potato Puffs and sausage slices. Serve with Honey Chipotle Dip.
![ConAgra-logo]() Alexia Foods offers frozen potatoes, appetizers, breads and side dishes with minimal, but distinctive, real ingredients that serve-up exceptional Farm to Flavor taste – right in your kitchen. For more from recipes, tips and inspiration from Alexia online, check out AlexiaFoods.com
Alexia Foods offers frozen potatoes, appetizers, breads and side dishes with minimal, but distinctive, real ingredients that serve-up exceptional Farm to Flavor taste – right in your kitchen. For more from recipes, tips and inspiration from Alexia online, check out AlexiaFoods.com
The post Black Bean Avocado Waffle Fry Bites appeared first on Whipped.